How long does it take to Epoxy a Garage Floor
Epoxying a garage floor can transform the cosmetic appeal of a garage while making it more durable and easy to maintain. It doesn’t matter if you are interested in improving your floor’s aesthetic or protecting it from damage; both require proper planning. One of the most common questions people ask is, “How long does it take to epoxy a garage floor?”
This guide will walk you through the steps, timing, and everything you’ll need to know to successfully epoxy your garage floor.
Table of Contents
What is Epoxy Flooring, and Why Choose It for Your Garage?
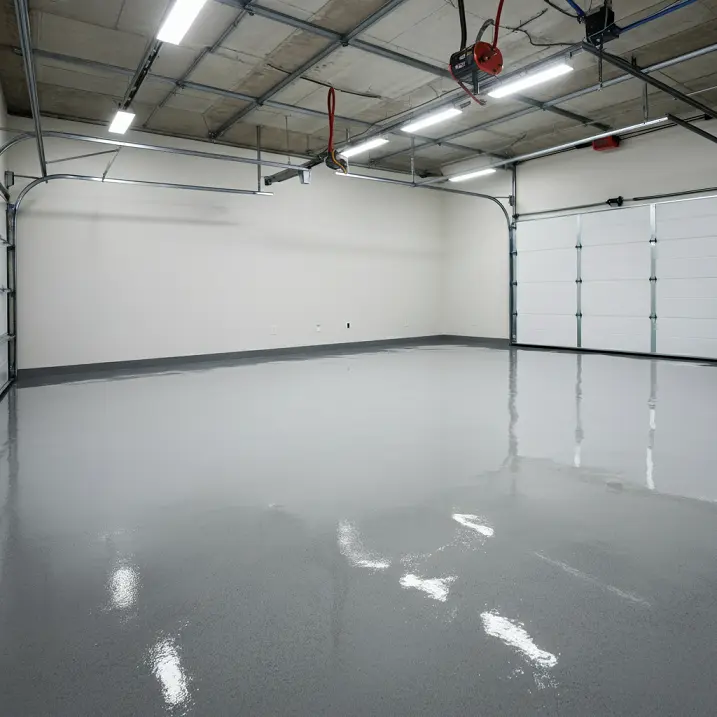
Epoxy flooring is a coating made by mixing resin and hardener, which, when applied to a garage floor, creates a shiny and extremely durable surface. It’s resistant to chemicals, stains, and heavy impacts, making it an excellent choice for garages. Here’s why people love epoxy:
- Durability: Epoxy can withstand heavy vehicles and regular foot traffic.
- Appearance: It gives the floor a sleek, high-gloss finish.
- Protection: It shields the concrete beneath from cracks, moisture, and stains.
- Low Maintenance: Epoxy surfaces are smooth, making them easy to clean.
Its practical advantages and aesthetic appeal make epoxy coatings one of the top picks for garage floors.
Planning the Epoxy Process
A successful epoxy installation begins with proper planning. First, ensure the weather conditions are right. Epoxy works best when the temperature is between 60–90°F and the humidity is low.
Next, gather all the tools you’ll need:
- Epoxy kit (resin, hardener, and optional paint flakes)
- Floor cleaner and degreaser
- A squeegee or roller for application
- Safety gear (gloves, goggles, and a mask)
Clear the garage of all items to prepare for the lengthy curing time.
Pro Tip: Clean and prepare your garage floor thoroughly. Remove oil stains, grease, and dust, as these can interfere with adhesion.
How Long Does It Take to Epoxy a Garage Floor?
The time required to epoxy a garage floor depends on several factors, including the size of the floor, the condition of the surface, and the type of epoxy being used. Generally, the process should take two to three days from start to finish. Here’s how the time breaks down:
1. Preparation Time:
Cleaning and repairing the floor can take 4–6 hours, depending on its condition. Cracks and imperfections need to be filled and cured before any coating is applied.
2. Application Time:
Applying the first coat of epoxy typically takes 2–4 hours, including mixing and spreading the product. If a second coat is needed or desired, you’ll need to wait around 6–10 hours for the first coat to dry before applying the next.
3. Drying Time Before Use:
While epoxy floors dry to the touch in roughly 12–24 hours, heavier use is discouraged until the floor is fully cured (covered further below).
If you’re a beginner, add some buffer time to account for learning as you go or fixing minor mistakes.
How Long Does Epoxy Paint Take to Dry?
Epoxy paint typically dries to the touch within 12–24 hours, but this timeline varies based on humidity, temperature, and ventilation. During this drying period, avoid walking on the floor or disturbing the surface to prevent imperfections.
For warmer climates or controlled indoor conditions, drying can lean toward the 12-hour mark. However, in cooler or more humid environments, it can reach 24 hours or more.
To speed up drying, ensure your garage is well-ventilated and maintain the recommended temperature range.
How Long for Epoxy Floor to Cure?
The curing time for an epoxy floor refers to how long it takes before the surface is ready for heavy-duty use, such as parking vehicles or moving heavy items. On average, epoxy takes 7 days to cure fully.
Here’s a breakdown of when you can use the floor during the curing process:
- 12–24 Hours: Light foot traffic is safe.
- 3 Days: You can begin moving furniture or lightweight items back into the garage.
- 7 Days: Full curing is complete, and the garage is ready for vehicles and heavy-duty use.
Patience is key here. Rushing the curing process can reduce the durability and longevity of your epoxy coating.
Key Steps in the Epoxy Application Process
To achieve a professional finish, follow these steps:
Clean and Prep the Surface:
Remove dirt, grease, and stains. Acid etching or mechanical grinding may be required to roughen the surface for adhesion.
Fill Any Cracks or Holes:
Use a suitable filler to repair imperfections and allow them to cure fully.
Apply the Primer (Optional):
A primer can improve adhesion and make the epoxy spread more evenly.
Mix and Apply the Epoxy:
Combine the resin and hardener as directed. Spread it carefully with a roller or squeegee, ensuring even coverage.
Add Decorative Flakes (Optional):
For a textured, slip-resistant finish, sprinkle decorative flakes onto the wet epoxy.
Apply Additional Coats:
Depending on the desired thickness and durability, additional coats may be necessary.
Allow to Cure:
Follow the manufacturer’s guidelines for drying and curing times.
Avoid shortcuts—how well you prepare and apply the epoxy decides how long the floor will last.
Common Challenges During Application and How to Avoid Them
- Bubbling: Ensure the surface is clean and free of moisture before application.
- Peeling or Delamination: This can happen if the floor isn’t properly prepared. Always remove old coatings and smooth the surface.
- Uneven Finish: Use consistent strokes when rolling or squeegeeing the epoxy for an even application.
If you’re new to the epoxy application, it might be worth practicing in a smaller area first.
Maintaining Your Epoxy Garage Floor
After curing, epoxy floors are relatively low maintenance. Keep them clean by sweeping regularly and wiping up spills immediately. For deeper cleaning, use a mild detergent and avoid harsh chemicals that can erode the surface.
Adding protective mats or pads under vehicles or heavy equipment can further prolong the life of your epoxy floor.
Tips for a Professional Finish
- Use high-quality epoxy products designed specifically for garage floors.
- Work in small sections to ensure even application and prevent the product from curing before you spread it.
- Pay attention to the curing time and avoid rushing any step.
- Use anti-slip additives on areas prone to becoming slippery when wet.
If you’re unsure about handling epoxy flooring yourself, hiring a professional can save time and effort while delivering a top-notch finish.
FAQ Section
How much does it cost to epoxy a garage floor?
The cost varies depending on the size of the garage and the quality of the epoxy, but it typically ranges from $3 to $12 per square foot.
Can I epoxy over existing paint or coatings?
No, it’s best to remove old coatings or paint for proper adhesion. Prepare the surface by grinding, sanding, or acid etching.
How can I fix bubbles or imperfections in the epoxy?
Bubbles can be sanded out and covered with a fresh layer of epoxy. Larger imperfections may require patching and reapplication.
Is epoxy flooring slippery?
Epoxy can become slippery when wet. Adding anti-slip additives during application reduces this risk.
How long does an epoxy garage floor last?
With proper maintenance, epoxy floors can last 10–20 years.
Final Thoughts Epoxying your garage floor is simple with the right tools, prep, and patience. Follow the steps and timelines, and you’ll have a durable, great-looking floor in no time!